Merchant handbook

Run the stall from the portal and the POS terminal.

After the organiser approves you, Groove gives you two surfaces: the merchant portal for events, sales, and payouts, and the POS terminal for selling on the floor. Desk hosts and gate staff use the same terminal app with a different home screen.

Audience Merchants, desk hosts, gate staff Updated October 2026

Your two tools

Merchant portal

Your browser desk on the Groove organiser site once you sign in as a merchant. Check invites, sales, tap-to-pay helpers, reports, payouts, and settings.

POS terminal

The floor app on your POS terminal. Merchants get Deck, POS, Tabs, and Queue. Desk hosts get Link, Top up, and Balance. Gate staff get the scanner flow.

Get access

  1. Apply for a stall (or accept an organiser invite).
  2. Finish activation from the email: set your password and business details.
  3. Sign in on the Groove organiser site. Merchants land in the merchant portal home.
  4. Open the POS terminal on your device, then sign in with the same email and password.

If sign in fails, the account is not live yet. Ask the organiser, not the guest in front of you.

Merchant portal

Left nav: Overview, Notifications, My events, Tap to pay, Sales, Reports, Payouts, Settings.
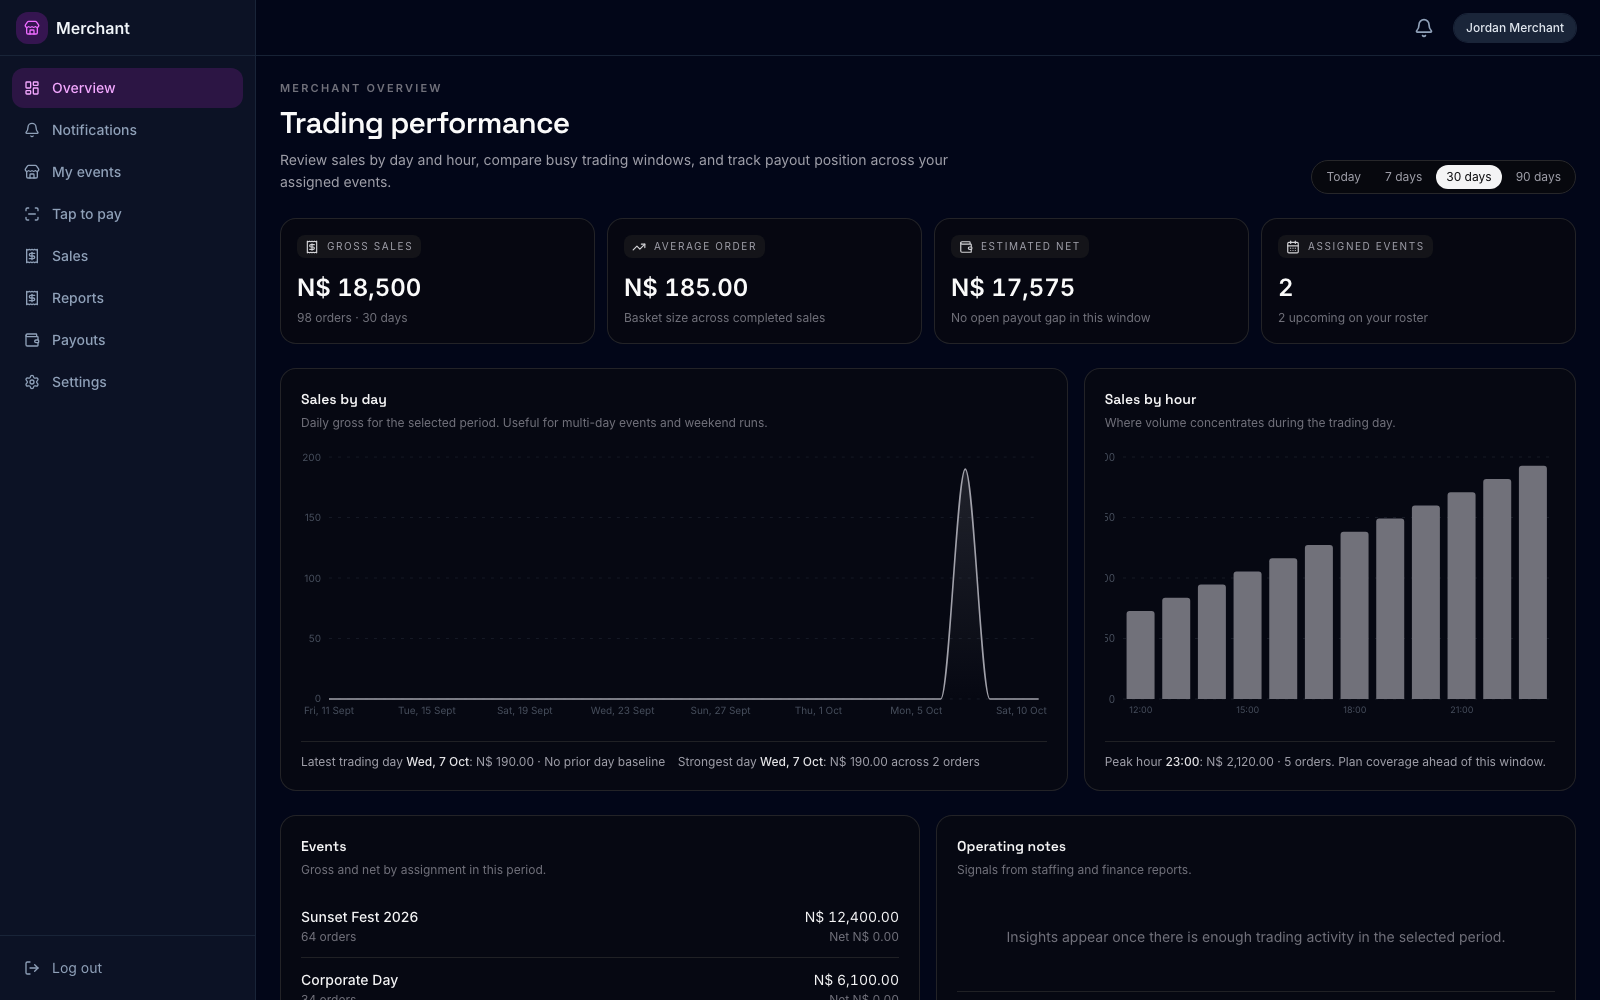
Merchant portal overview 1 Sidebar 2 Sales pulse
Merchant portal Overview. Use the range chips (Today, 7 days, 30 days, 90 days) to read how the stall is trading.
  1. Overview — sales pulse, charts, and shortcuts into unfinished work.
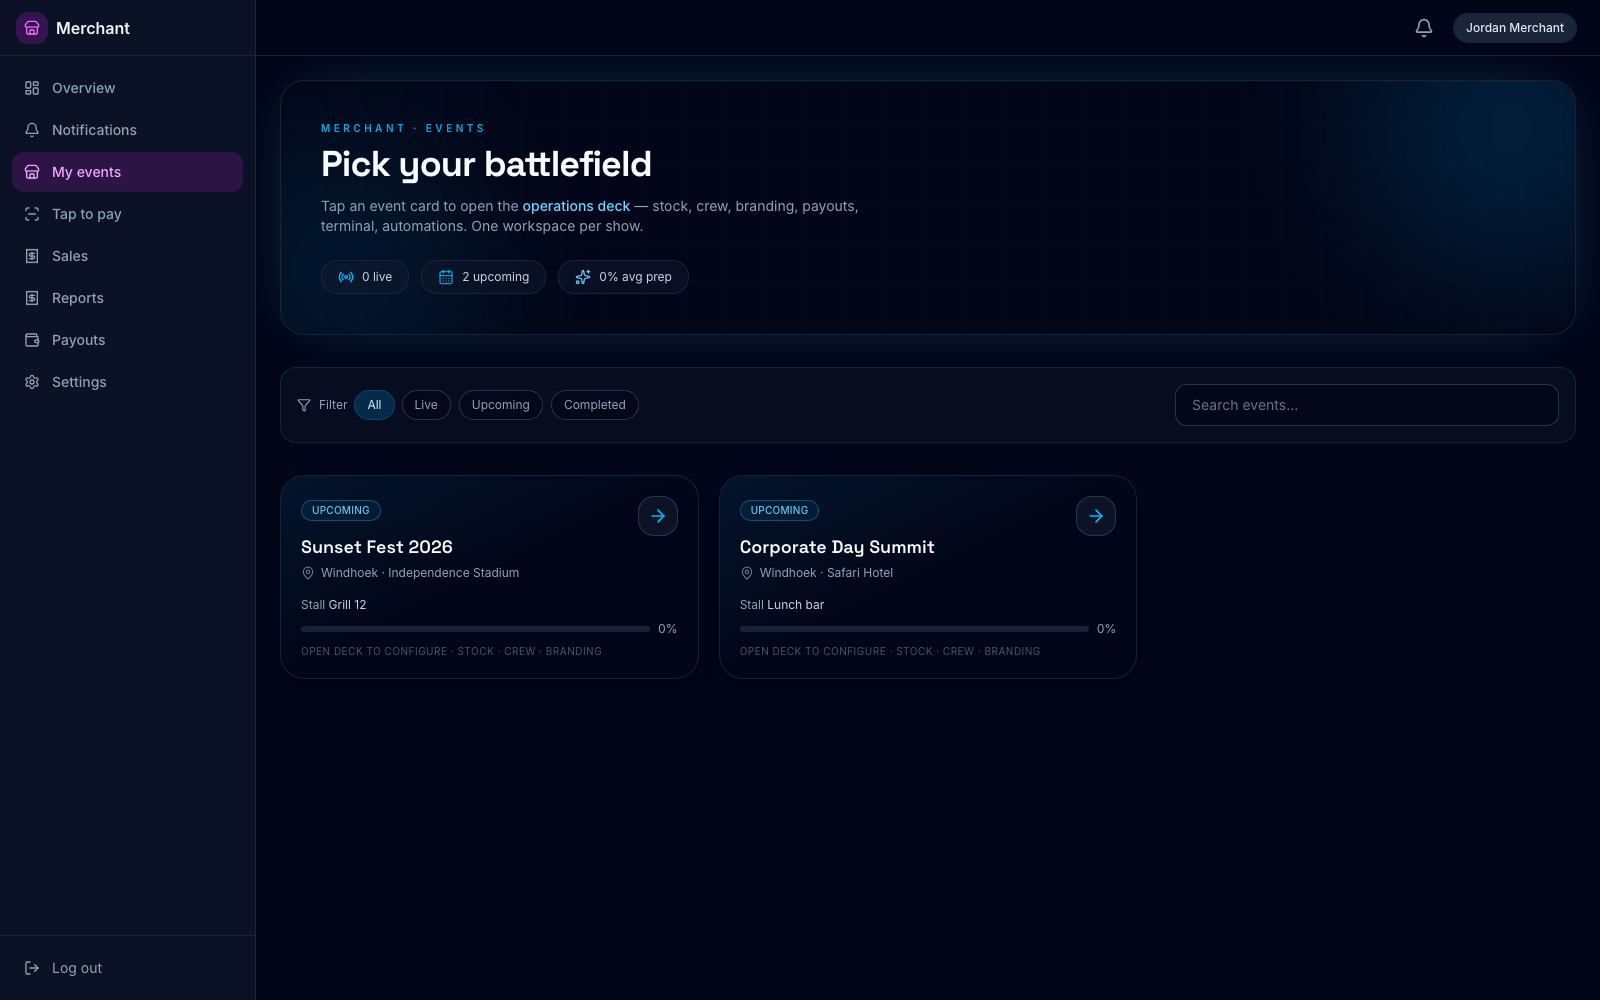
  2. My events — events you are assigned to. Confirm you are on the right show before doors.
  3. Tap to pay — helpers for charging event wallets when you are not on the full POS layout.
  4. Sales and Reports — what moved through the stall.
  5. Payouts — request settlement when the organiser finance desk is ready.
  6. Settings — business profile, payout details, notification prefs, and floor status.
Merchant portal My events Assigned events
My events lists every show your stall is booked for. Open a card into that event’s operations deck — stock, crew, branding, wallet, terminal pairing, and notes — before doors.
Paused accounts If your organiser or Groove pauses the stall, trading routes lock and Settings becomes the place to sort it out. The POS terminal will also refuse to operate.

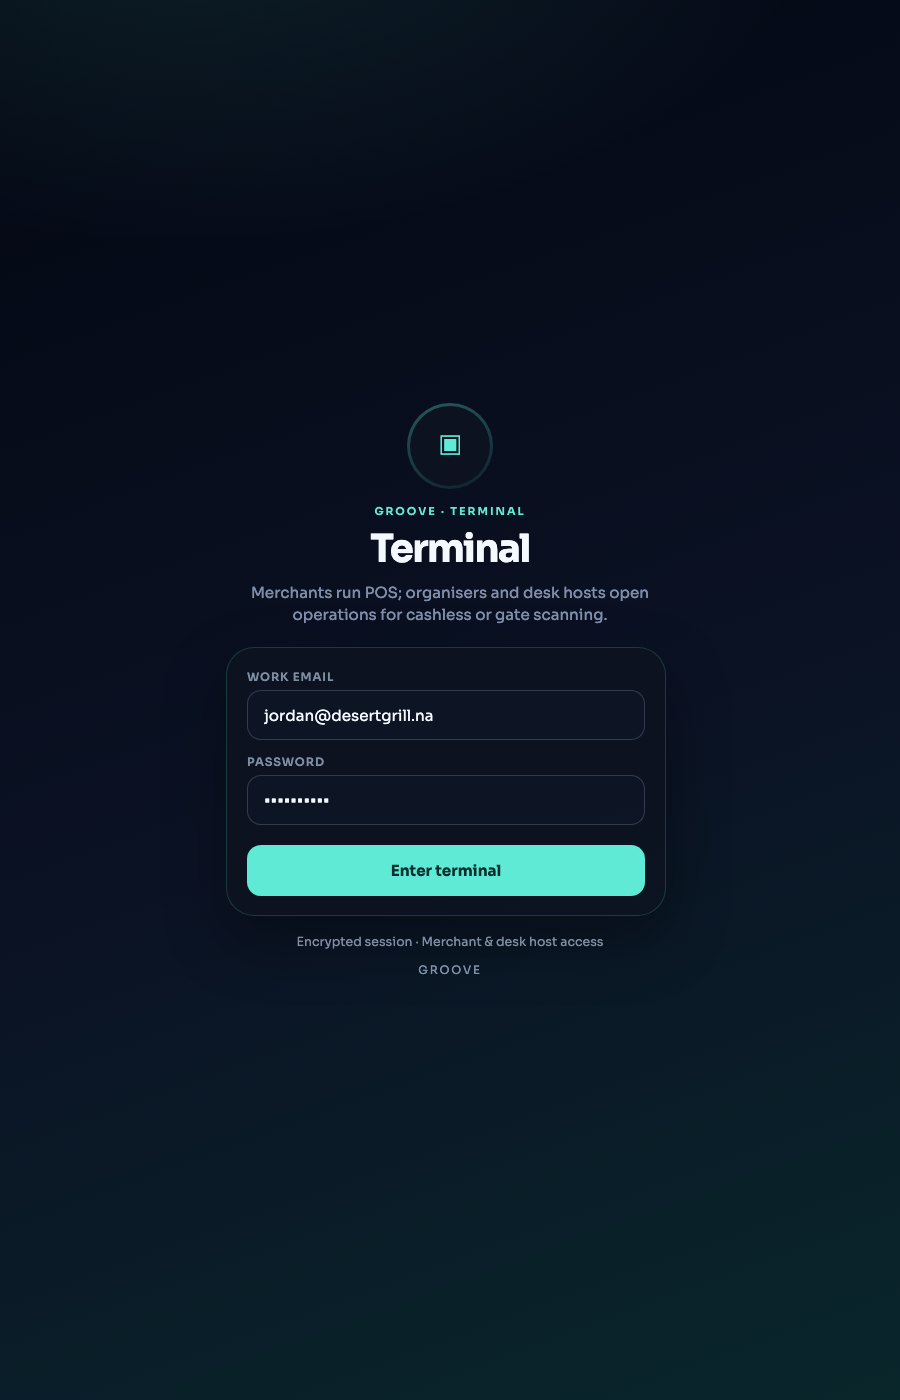
POS terminal sign in

POS terminal sign in Sign in
POS terminal sign in. Tap Enter terminal with the same work email and password from activation.
  • Charge the POS terminal, raise brightness, and turn NFC on if you take bands.
  • Join the venue network before the queue arrives.
  • Sign in before doors. Your role chooses the home screen.

Command deck

Merchant home on the POS terminal. Eyebrow Command deck. Shows your business name, upcoming events, and which shows have cashless live.
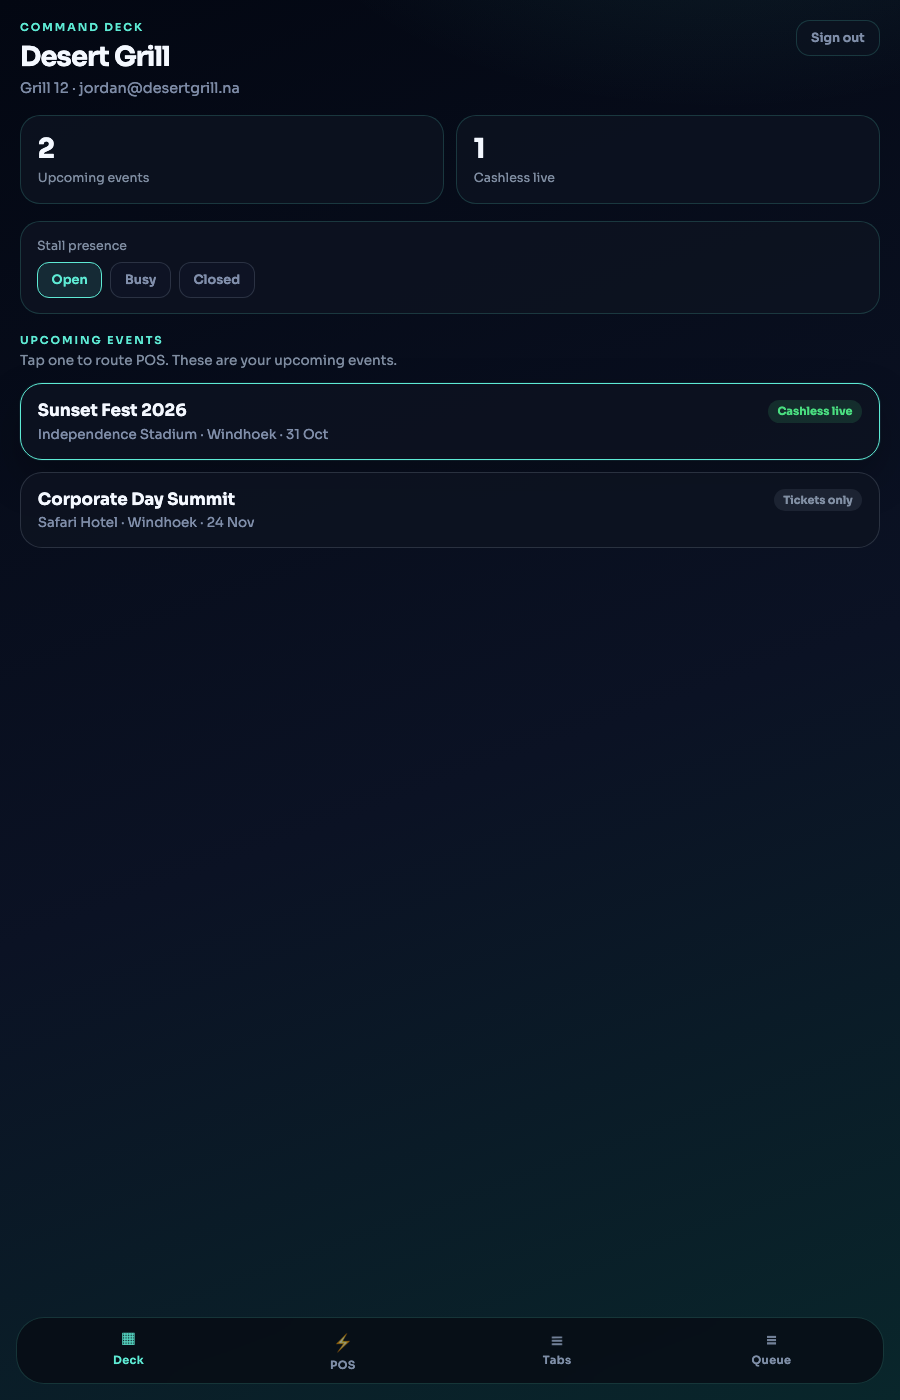
POS terminal command deck Events Deck · POS · Tabs · Queue
Tap an event to route the till. The bottom bar is Deck, POS, Tabs, and Queue.
  1. Confirm the correct event is selected. The wrong event charges the wrong wallet.
  2. Check Cashless live before you promise wallet pay.
  3. Open POS when you are ready to sell.

Sell on POS

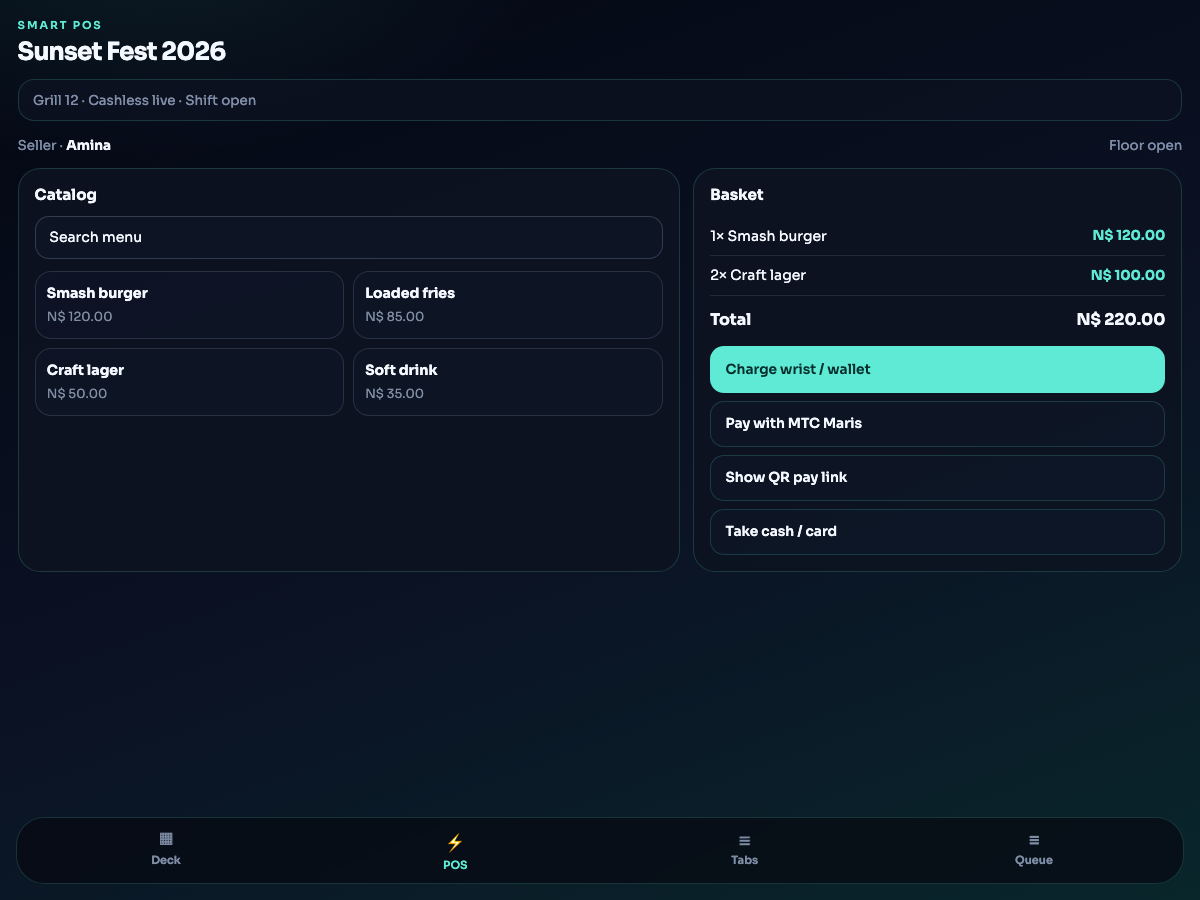
POS terminal sell screen 1 Menu 2 Guest 3 Settle
Smart POS: build the basket from Catalog, then settle from the Basket panel. Only confirm cash or card when the money is actually there.
  1. Deck: pick the event.
  2. Start shift on POS (crew PIN or sell as stall owner) before the first basket.
  3. POS: add items from Catalog into the Basket.
  4. Settle:
    • Charge wrist / wallet debits the event balance.
    • Pay with MTC Maris follows the Maris flow on screen; verify success before you hand over the goods.
    • Show QR pay link when the guest pays from their phone.
    • Take cash / card is for money you confirm only when paid.
  5. If the guest must approve on their phone, wait. Do not ring the sale twice while it is pending.
A declined OTP is a declined sale Cancel cleanly and start again. A second charge on a half-finished one is how a guest pays twice.

Tabs

A tab is an open bill for a table or a regular. Add to it through the event. Close it on a real settle path before you pack up. An open tab at load-out is still money you do not have.

Queue

The queue lists checkout sessions: waiting, paid, cancelled. Use it when a guest says they already paid and your screen moved on. Open the session, read the status, then decide. Do not create a new charge “just to check”.

Wearable desk

Desk host logins land in ops, not on the till. Stall merchants selling food or merch stay on Deck and POS. Desk hosts have three jobs:

Link

Attach a wearable to a guest wallet, or open a guest wallet when they have no app account.

Top up

Credit the wallet from the desk. Trust the success on screen before you send them back into the venue.

Balance

Read what the band is worth before you argue with it. A frozen wallet will not spend.

Desk mode does not ring up drinks, no matter how persuasive the queue becomes.

Gate mode

  1. Pick the event and finish setup.
  2. Scan. Believe the result.
  3. Allow means they pass. Do not keep scanning the same code.
  4. Deny means they do not. Read the reason once.
  5. Re-entry follows the rule configured for that event.
  6. Override is a supervisor path. If you are not that person, fetch them.

Some venues also use a lighter gate scanner for rooms that only check tickets. Same access rules, same decisions on screen.

Crew on a shift

Keep named crew against an event: who is on the till, shift check-in, check-out. Sharing one login across four people makes the ledger useless the morning after.
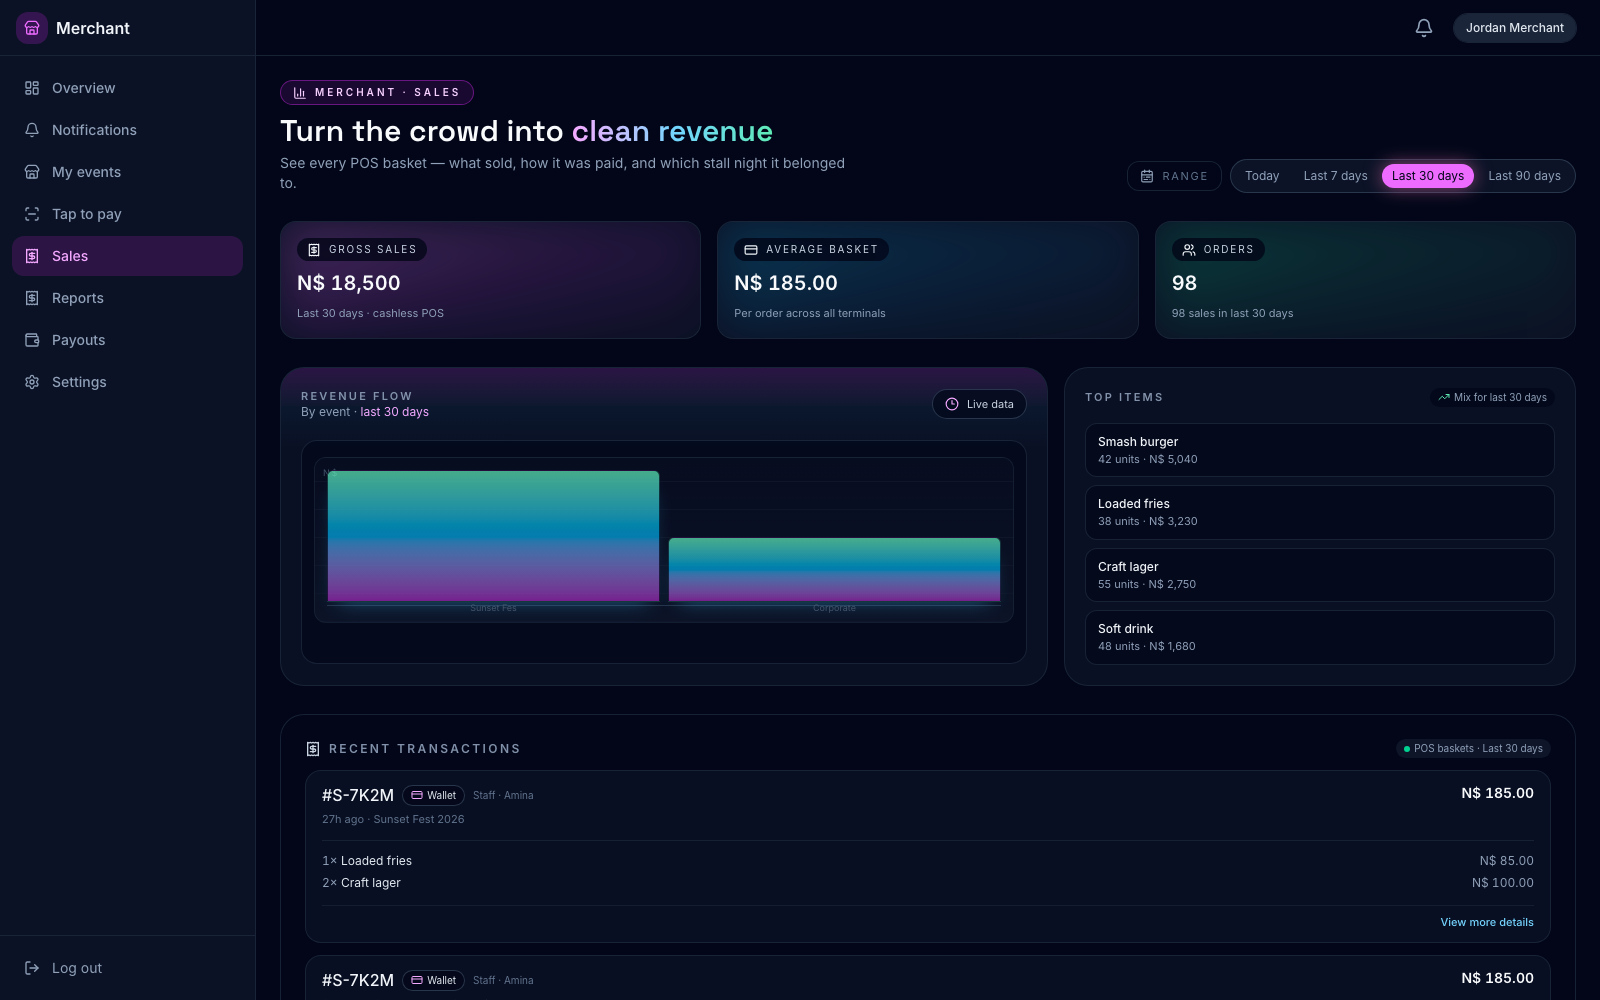
Sales and payouts

Merchant portal sales
Portal Sales and Payouts are where you review what traded and request settlement. Do not invent a side cash deal and expect Groove to match it later.
  1. Review Sales after busy periods so disputes still have a trail.
  2. Open Payouts when you are ready to request settlement.
  3. Keep payout details current in Settings (bank or Maris wallet as configured).

Close the shift

  • Clear the queue. Cancel what will never be paid. Settle what was served.
  • Close open tabs.
  • Check out the crew shift.
  • Sign out before the POS terminal goes in a bag.
Pair this with The organiser handbook if you invited the stall, and the solution handbook for the wider product map.

Merchant handbook · October 2026